Manage merchant registration requests
Edit on GitHubThis document describes how to manage merchant registration requests in the Back Office. A marketplace operator views, approves, and rejects registration requests submitted by prospective merchants through the Storefront.
Prerequisites
To manage merchant registration requests, verify that the Merchant Self-Registration feature is installed.
View merchant registration requests
To view the list of merchant registration requests, do the following:
- In the Back Office, go to Marketplace > Merchant Registrations. This displays the Merchant Registrations page with a list of all submitted requests.
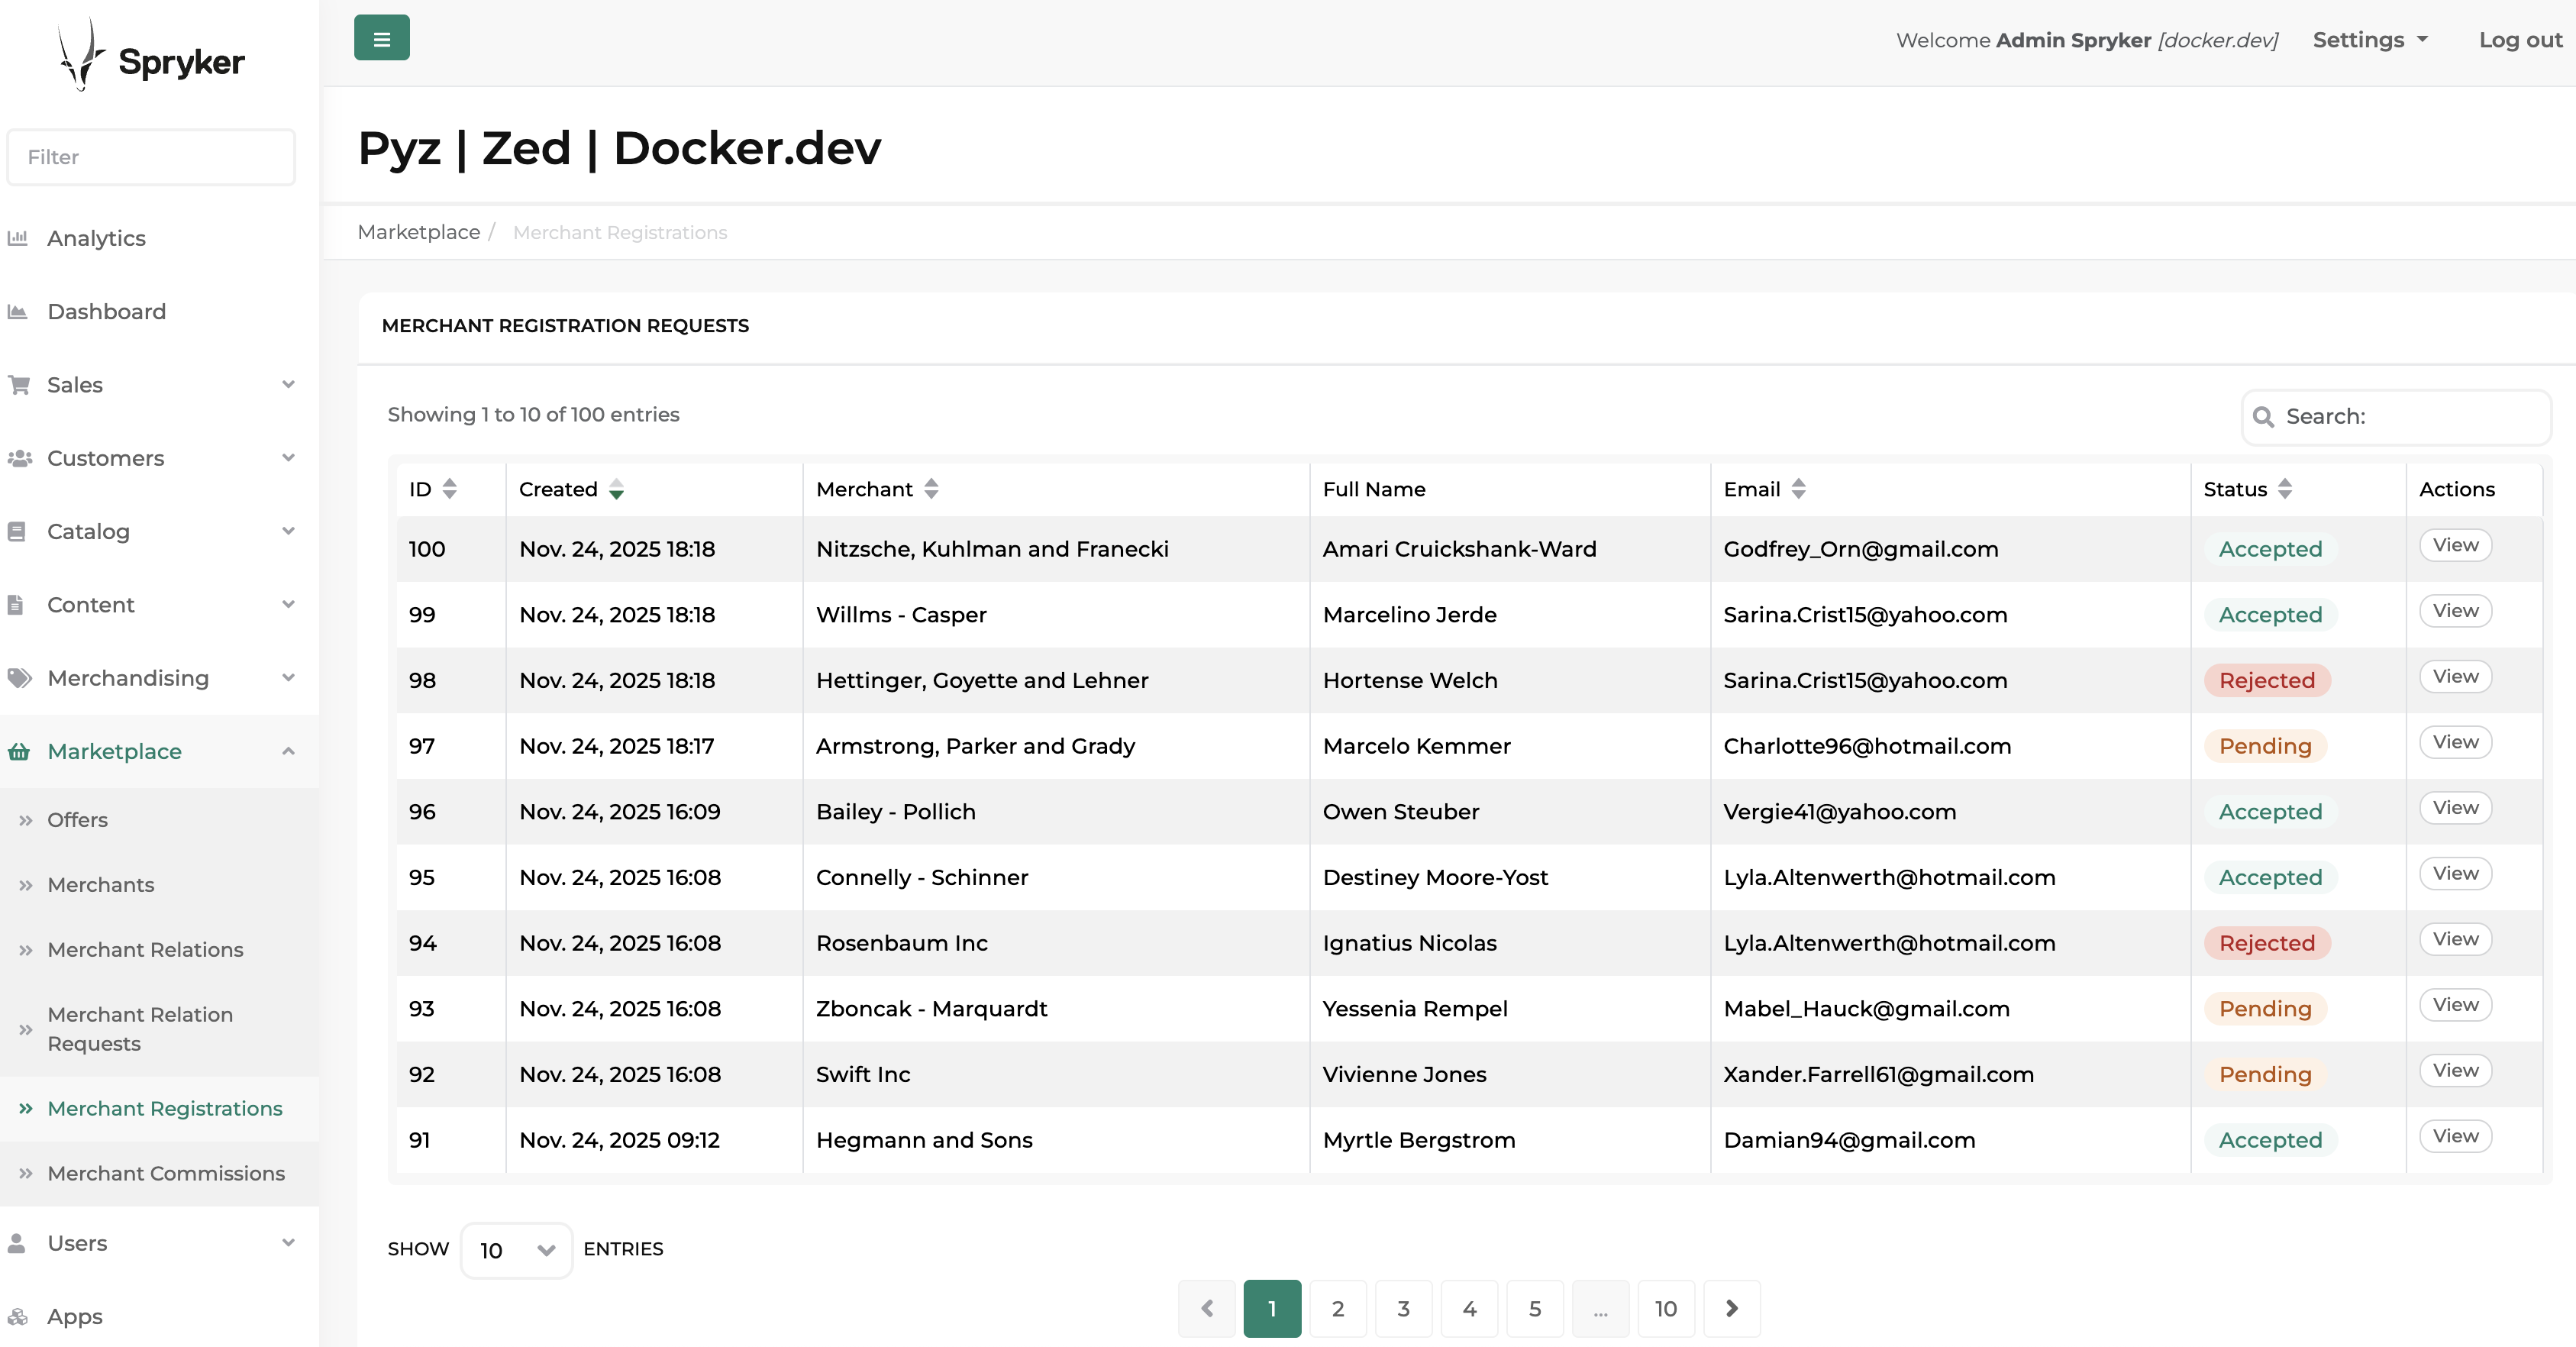
The table displays the following information:
- ID: Unique identifier of the registration request.
- Created: Date and time when the request was submitted (format:
MMM DD, YYYY HH:MM). - Merchant: Full name of the contact person (Title, First Name, Last Name).
- Email: Email address of the merchant user.
- Status: Current status of the request (Pending, Accepted, or Rejected).
- Actions: Available actions (View).
You can:
- Sort the table by clicking on the ID, Created, Merchant, Email, or Status column headers.
- Search for specific requests using the Merchant or Email search fields.
- Click View to see the full details of a registration request.
View merchant registration request details
To view the details of a merchant registration request, do the following:
- In the Back Office, go to Marketplace > Merchant Registrations.
- In the Actions column, click View for the request you want to review. This opens the merchant registration request details page.
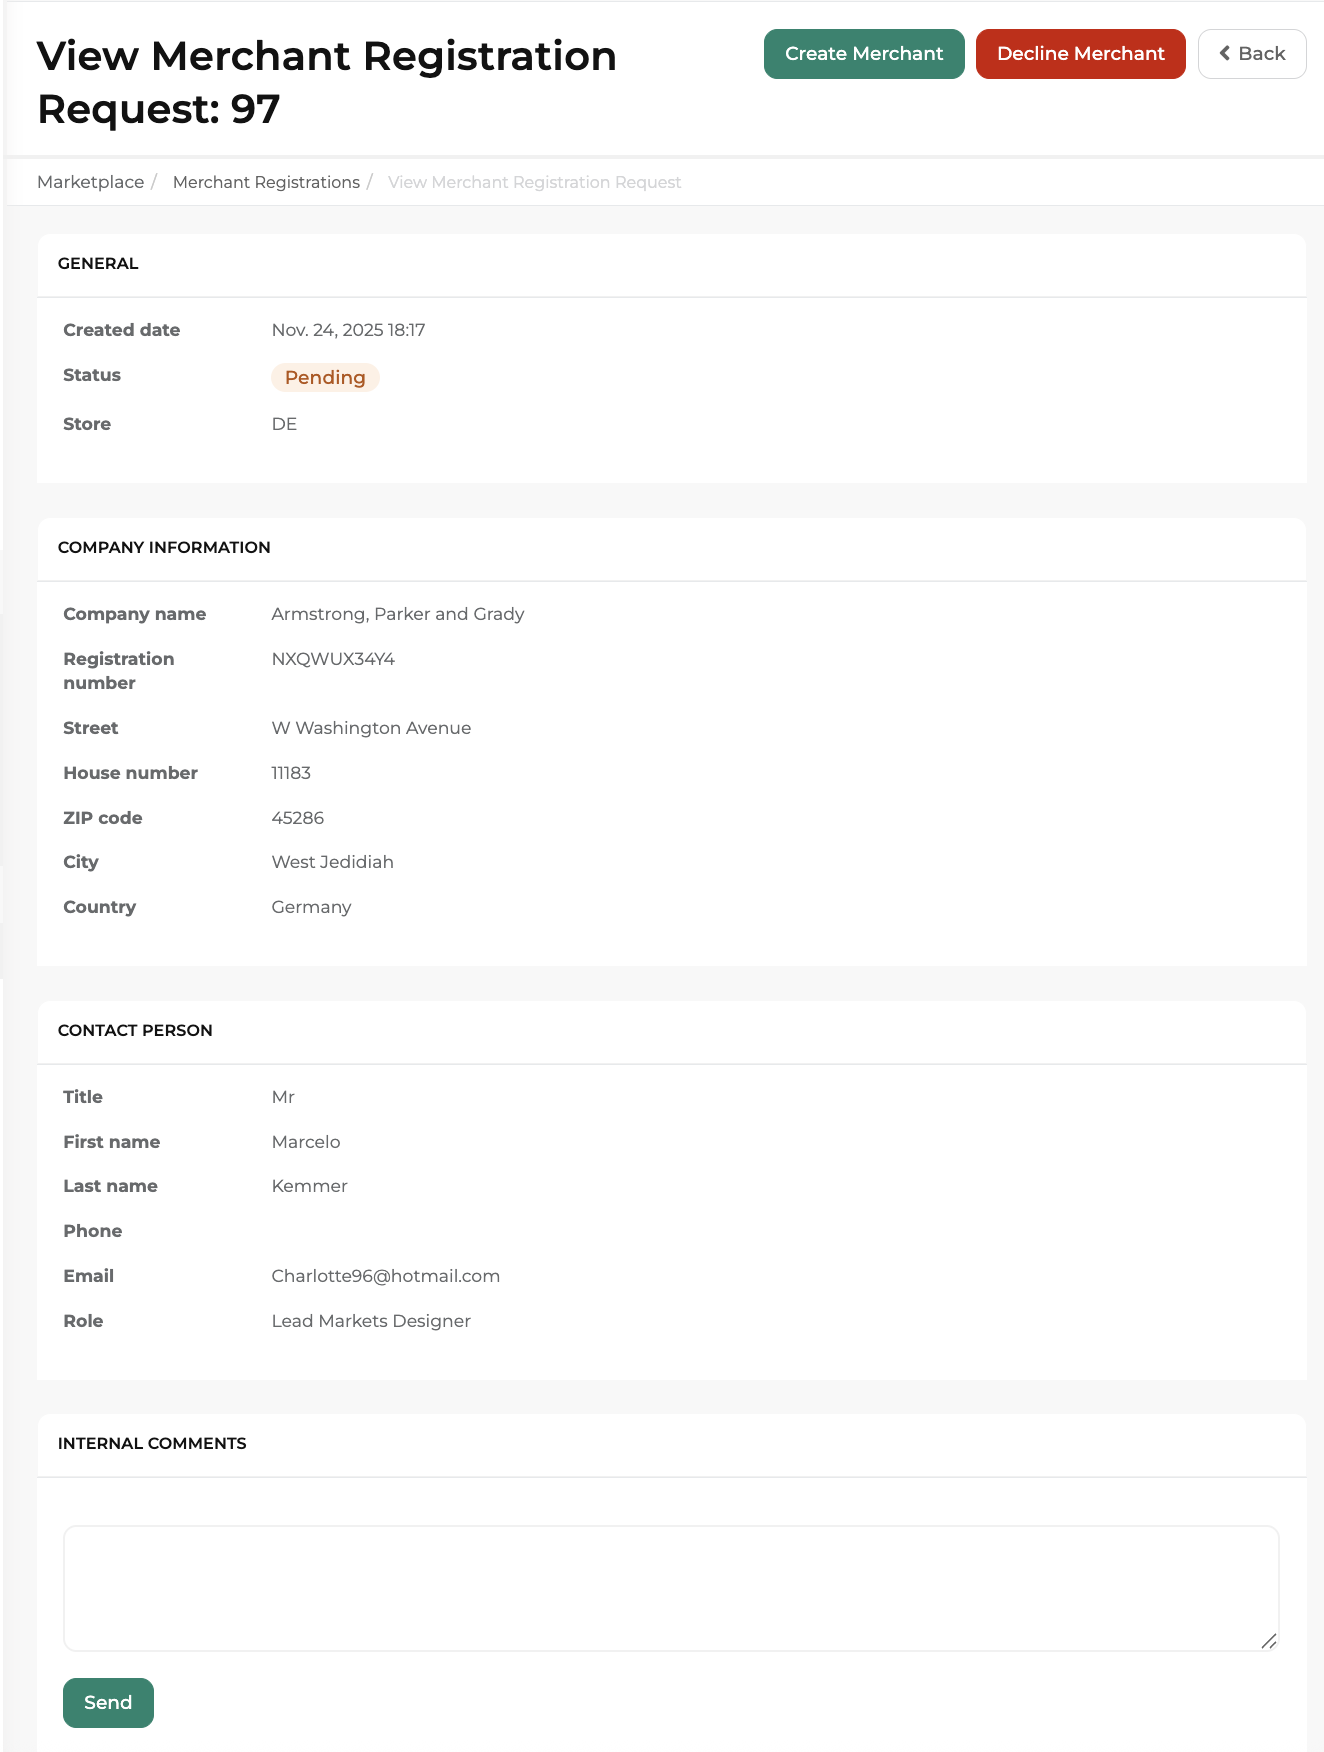
The page displays the following sections.
Company Information
This section shows the following details about the merchant’s company:
- Company name
- Registration number
- Country
- Street
- House number
- Zip code
- City
Contact Person
This section shows the following details about the merchant contact:
- Title
- First name
- Last name
- Role
- Phone
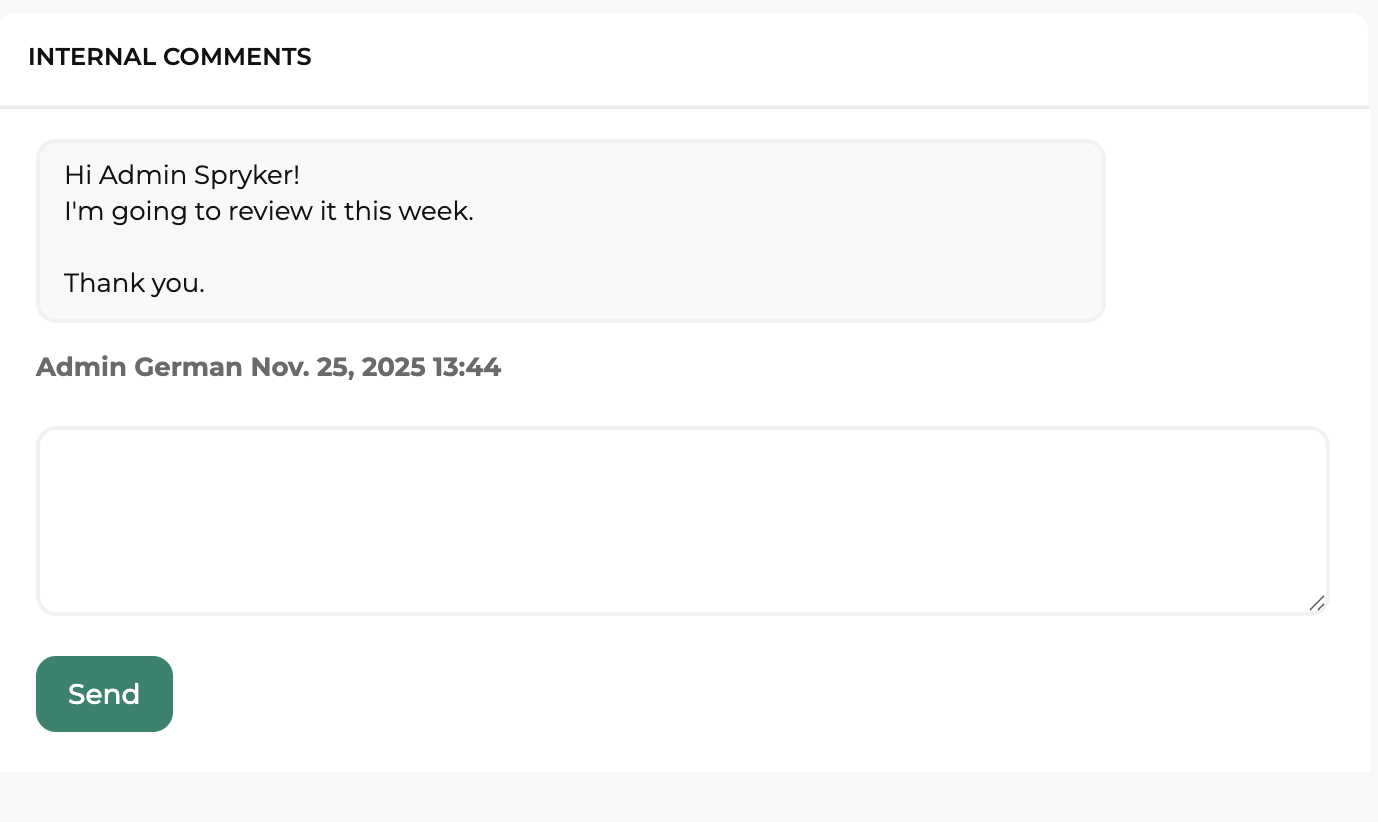
Internal Comments
At the bottom of the page, you can view and add internal comments to communicate with your team about the registration request. These comments are visible only to Back Office users and are not visible to the prospective merchant.
To add an internal comment:
- In the Internal Comments section, enter your comment in the text field.
- Click Send Comment.
Your comment is added to the thread with your username and timestamp. Your colleagues can see and respond to these internal comments.
Approve a merchant registration request
When you approve a registration request, a new merchant account and a default merchant user are created in the system with the status Inactive and approval status Waiting for Approval.
To approve a merchant registration request, do the following:
- In the Back Office, go to Marketplace > Merchant Registrations.
- In the Actions column, click View for the request you want to approve.
- Optional: Review the request details and internal comments.
- In the top-right corner, click Create Merchant. This opens the Approve Request confirmation page.
- Review the confirmation message: “Approving this request will create a merchant account.”
- Click Create merchant to confirm.
The system performs the following actions:
- Updates the request status to Accepted.
- Creates a new merchant with the provided company information.
- Creates a default merchant user with the email address from the request.
- Assigns the merchant the status Inactive and approval status Waiting for Approval.
- Displays a success message: “Merchant has been created.”
After approving a registration request, you need to:
- Edit the merchant to update its status to Active and approval status to Approved.
- Edit the user - activate the merchant user account and set a password
- Notify the merchant user about their account so they can log in to the Merchant Portal.
Reject a merchant registration request
When you reject a registration request, the request status is updated to Rejected and no merchant account is created.
To reject a merchant registration request, do the following:
- In the Back Office, go to Marketplace > Merchant Registrations.
- In the Actions column, click View for the request you want to reject.
- Optional: Add an internal comment explaining why the request is being rejected.
- In the top-right corner, click Decline Merchant.
This opens the Reject Request confirmation page. - Review the confirmation message: “Reject this request if you do not want to create a merchant account.”
- Click Reject Request to confirm.
The system performs the following actions:
- Updates the request status to Rejected.
- Displays a success message: “Merchant has been rejected.”
Once a request is rejected, it cannot be reopened or approved. If the merchant wants to register again, they need to submit a new registration request.
Registration request statuses
Merchant registration requests can have the following statuses:
| STATUS | DESCRIPTION | AVAILABLE ACTIONS |
|---|---|---|
| Pending | The request has been submitted and is awaiting review by the marketplace operator. | Create Merchant; Decline Merchant |
| Accepted | The request has been approved and a merchant account has been created. | None |
| Rejected | The request has been rejected and no merchant account was created. | None |
Thank you!
For submitting the form